TMI Gifts Logo

TMI Gifts Logo

Tuesday, September 9, 2014

How to Make a Turkey using a Work Wreath

How to Make a Turkey using a Work Wreath

This is going to be a fun and pretty easy wreath to make.  Robin of course makes everything look pretty easy because she is so talented.  We are going to try to give you a step by step on how to create this look for yourself.  We also have a video on how to do it that we are going to post below but you will have to bare with us as it is very informal. 


Ok so lets get started!  

Of course the first thing your going to need is a 24" Work Wreath.  
You can pretty much use this in any fall color for the base of the Turkey. 
Separate all the twigs and straighten them out.  This will make it a lot easier for you to hit each twig with the Designer Netting.  


http://shop.tmigifts.com/wreaths-24-work
The next step you are going to take is attaching your Designer Netting.  
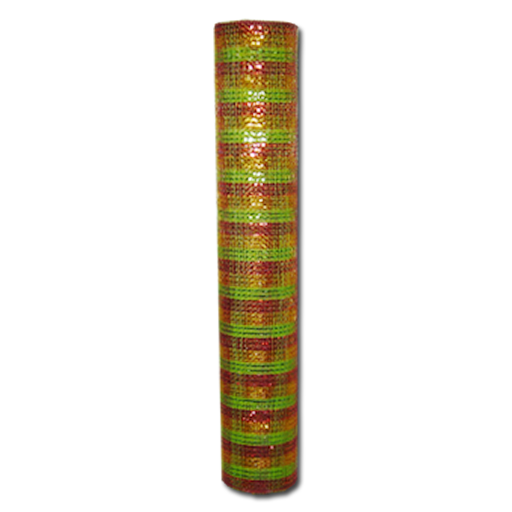
We used 20" Christmas Harvest.  The colors just went beautifully with what we were looking for.
It is a great variety of Fall colors all in one. Ok so if you have never made a wreath before I am going to try to explain it to you.   What you are going to do is take the end of the Designer Netting and attach it in between to twigs by twisting them together.  You will the take your netting and attache it to the next set of twigs (of course give it some poof).  If you are confused on how to do this be sure to watch the how to video linked below.   On this wreath we are going to attach the netting only 3/4 of the way.  

http://shop.tmigifts.com/20-x-10-yds-designer-netting-christmas-harvest-tdn70233/dp/985


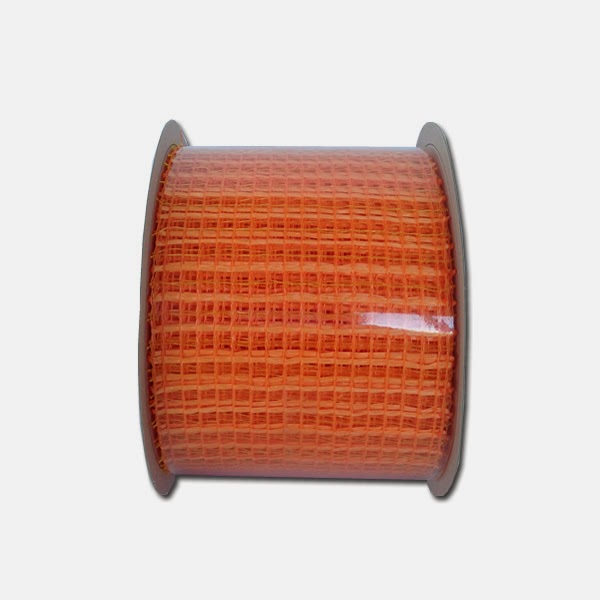
For the next step we are going to use our oh so popular Firegrass! Our Firegrass comes in Beige, Green, Orange and Brown. These are great Fall colors to use as a part of our Turkey's feathers.  I just love this idea!   And I can't get over how great it turned out!  Robin took a little bit of each of the firegrass and mixed it together so that she had a great mixture in each section of the feathers.  After doing that she attached the firegrass to the branches of the wreath (Oh and these feathers go in the area where she didn't attach any Designer Netting)  Whew! I nearly forgot that part. 

http://shop.tmigifts.com/floral-grass-firegrass-assorted-colors-65915/dp/1824


As you can probably see in the picture, Robin used more than just firegrass for the feathers of the Turkey.  She also used our Burlap Leaf Spray.  I love this spray because it just fit in perfectly with this design. Robin definitely had a great vision here for this design.
This spray comes in Cream, Red, Orange, Brown and Green.  Robin layered her burlap leaf spray on top of the firegrass and secured it with the branches just as she did the firegrass.


http://shop.tmigifts.com/searchresults/pg?q=burlap%20leaf%20spray


Next we are going to place our Turkey base in the wreath form.  This is pretty easy.  You just attach with the wreath branches in about the middle of the wreath.  The video shows you a little easier than I can explain it.

http://shop.tmigifts.com/16-metal-standing-turkey-6871/dp/7498
After attaching the Turkey you are going to want to make wings!  Robin did this by cutting strips of ribbon in 4" Gold Banana Weave, 4" Red Jute and a printed ribbon.  We are currently out of the printed ribbon Robin used.  If you would like to check out our printed ribbons click here
Robin cut strips of each of these ribbons to place on the sides of the turkey as wings. I wouldn't say she cut more than 15' strips of ribbon. Again the video shows you exactly how to do it.


http://shop.tmigifts.com/4-x-10-yds-designer-netting-banana-weave-gold-br40017/dp/4608
http://shop.tmigifts.com/4-x-10-yds-designer-netting-jute-red-jr40054/dp/4629

The outcome is oh so adorable!


Watch this step by step video to get a better understanding on how to make the Turkey wreath. 

Click this link to watch the video
https://www.youtube.com/watch?v=DiEvye6thzc&list=UUgs7Bd1lK9OsXVYu5bjcXEA


Monday, June 16, 2014

NEW HOME DECOR

New Home Decor

    It has been a while since we have introduced new Home Decor products so, today I want to make sure to share with you our newest pieces.  Seeing all the new decor pieces is one of my favorite parts of working at TMI Gifts! Today I want to introduce a few of my favorite pieces.  

http://shop.tmigifts.com/metal-wall-sconce-3-assorted-55553/dp/8675


Quartrefoil Wall Sconce

  
This piece is easily a favorite of mine.  With today's trending colors and patterns this fits it perfectly.  Quartrefoil or the clover pattern has been around for quite some time now. Its rounded shape can be seen in various decor pieces and architecture.  It has sprouted up in many fabrics, tiles and wood.  It can also be seen in furniture and iron work.  This timeless and elegant design has it’s roots dating back to Medieval times and served as a staple in Gothic Architecture. You can use this classic shape in your own decor to add a touch of sophistication and elegance. 

You can find these beautifully made sconces HERE


http://shop.tmigifts.com/wood-symbol-55884/dp/7792


Wooden Ampersand Symbol 


This piece is a must for many right now!  The ampersand is trending big, especially for weddings! Some of the best trends are the most simple ones.  It definitely makes for a fun accessory to add to your wedding. This isn't just trending for weddings but the ampersand makes a great home decor piece.  You see it every where right now!  You will see it being used as photo props, wedding pieces, wall decor, and center pieces.  

You can find this ampersand HERE


Be sure to watch for our next post!  We will be talking about wedding decor!


Tuesday, June 3, 2014

How to Cover Wooden Letters

How to Cover Wooden Letters

Covering MDF Wooden Letters aren't as difficult as you might think. In the video below Robin has shown us exactly how to do it with no trouble at all.  

You will need the following items. 
 Watch the video posted below for detailed instructions.  

1. A Wooden Letter
It comes in a 12" or a 20" 

http://shop.tmigifts.com/searchresults/pg?q=letter

 2. Fabric of any kind.  
In this video Robin uses:
20" Burlap Peacock

 20" Designer Netting Snap Dragon 

http://shop.tmigifts.com/20-x-10-yds-designer-netting-snapdragon-tdn70241/dp/6026
 
3. Spray Adhesive 
You can get this at any Walmart or Hardware Store


4. Utility Knife 


 Watch our How To Video for detailed instructions on how to cover a letter.


Tuesday, May 6, 2014

How to make a Bow!

How to make a Bow!  

We are going back to the basics today.   Making a bow isn't as hard as it looks.  Trust me, if I can do it anyone can!  Robin is going to show us two different ways to make a bow today.  I must say she is a talented woman.  She taught me how to make a bow and like I said before if I can do it anyone can! 

You can use any kind of ribbon you would like but here is a list of what Robin used in this video.  


  Little Bit of Sunrise Bow

First you want to start off with your basket weave ribbon.  Robin left a tail of about 12" to start her bow with.  Loop once to each size according to how big you would like your bow to be.  Then cut the ribbon to where you have the same amount hanging on both tails.


http://shop.tmigifts.com/25-x-15-yds-poly-wired-ribbon-diamond-dream-orange-yellow-fuschia-90787w-c02-40g/dp/8041

Layer your diamond dream ribbon on top of your basket weave.  Just like you did with your first ribbon you will loop once to each size according to how big you would like your bow to be.  Then cut the ribbon to where you have the same amount hanging on both tails. Note that each time you layer a new ribbon, you want to make your loops a little bit smaller. 
   
Do this step with next two ribbons.  

http://shop.tmigifts.com/25-x-10-yds-poly-wired-chevron-classic-yellow-ribbon-90823w-079-40f/dp/7865


http://shop.tmigifts.com/ribbon-15-x-50-yds-poly-sheer-wired-surprise-citrus-f624919/dp/3071


This is the last ribbon you are going to want to use since it is one of the smaller sizes.  Follow the steps you took with the previous ribbons but with this one after you cut the ribbon you are going to want to use another strip.  This last step isn't too hard but if you have trouble visioning it just watch the video below and it will give you a better idea.  

Leave a tail and pinch the ribbon with your fingers where you are holding the bow secure at.  Then you just make a small loop over your thumb so that you ribbon crosses to the opposite side of the bow you started on.  So while still holding your bow tight, slip the zip tie through the loop ans tighten it.  This step covers up your mechanics.  

Then you have your bow!  It is as easy as that.

  For more information call Robin or Tiffoni at 1-800-869-3395.  You can also email tiffoni.tmigifts@gmail.com.


Tuesday, April 22, 2014

Secretary's Day


At work we often turn to a certain person when we have a problem, need assistance and are needing something done. That person also knows the inner workings of the office and keeps it running in tip-top shape. You might call them office managers, secretaries or assistants, there is a special day of the year that honors and recognizes the millions of hard workers who fulfill that need. Take the day to show them how much you appreciate them. Whether it be a heartfelt thank you or a gift that shows your appreciation.


Administrators Professionals’/ Secretary’s Day is April 23, 2014.


Friday, April 18, 2014

How to Make a Wreath

How to make a wreath with a Grapevine form. 


Ok so today lets talk about how to make a wreath with a grapevine form.  This to me is one of the easiest wreaths to make.  I also feel like it is such a simple and rustic look. I personally love this look!

This particular one is more of a Spring/Summer look! 


You will need a grapevine wreath.  The one pictured above is a  24" Grapevine wreath.
You can use which ever size is best for you.  We also carry an 18", 30" and 36" Grapevine wreaths.


The Next step you need to take is to take your Yellow Daisy and either secure with a zip tie or weaving the branches in through the grapevine twigs.  Using a zip tie would be the easiest thing to do.  When you zip tie them on, try to do it about the middle of the stem and to where your bow will cover it. 

Take the ends of the stems and bend them to curl.  Don't over think this part because it really isn't hard and it doesn't have to be any particular way or going any specific direction.  On this wreath there is a flower pointing up and two placed downwards all on the left side of the wreath.


Dry Curly Grass always adds a nice look to anything.  I always think a little greenery can make things look a little more realistic and in this case I think it gives the wreath a little more texture.  The curls just really make it fun! 
Take the bundle of the 24" Light Green Dry Curly Grass and pull it apart.  Take a few twigs and place them throughout the left side of the wreath.  Use it on top and the bottom. Simply secure it by poking in through the grapevine wreath. It is as simple as that.  

Right now you are probably feeling like your wreath isn't looking right.  But don't you worry because it will all come together once you get the rest of your product on there. 

Lets start working on the bow now!

This is a different kind of bow than what we normally do. First take your 4" Natural Jute and cut a strip about 28" to 30" long.  Hold your ribbon 7" from the bottom of one end of the ribbon and make a loop big enough to where you have about 7" hanging from the other end of the ribbon.  You're going to do this with every strip of ribbon and layer it.  I would make your jute the bottom layer, pink banana weave, lime Designer Netting and then layer your printed ribbons on there to what suits you best.  When layering them make sure your loops are all facing a different direction.  You don't want a bunch of loops all going the same direction.  If you did that, you really wouldn't have a bow.   After you are done layering, you then zip tie your bow to the grapevine wreath about the middle on the left side. 


http://shop.tmigifts.com/4-x-10-yds-designer-netting-banana-weave-hot-pink-br40013/dp/4604

http://shop.tmigifts.com/3-x-20-yds-designer-netting-apple-with-lime-glamour-mr81007/dp/135 


http://shop.tmigifts.com/25x-25-yds-poly-wired-striped-dazzle-2-we-90083w-061-40j/dp/7503


Now for the very last thing!  We put a Bottle Cap Owl inside our wreath. All we did was take his little feet and poke them in the grapevine to secure it.  You can also use a zip tie. 

http://shop.tmigifts.com/owl-standing-with-bug-eyes-3-asst-312108/dp/7956


Here are some other suggestions. Just in case you aren't a fan of the Bottle Cap Owl. 

Metal bird with glitter wings 

http://shop.tmigifts.com/metal-bird-with-glitter-wings-9-tall-4-styles-priced-per-each-212150/dp/6740


http://shop.tmigifts.com/wall-decor-metal-spring-butterfly-3d-bright-colors-15-2-styles-priced-per-each-212389/dp/6722


If you have any questions about how this wreath was made or more in depth questions, you can email tiffoni.tmigifts@gmail.com or call 1-800-869-3395 and ask for Robin or Tiffoni.


Monday, April 14, 2014

20" x 10 Yds Chevron Burlap in now in!


20" Burlap in now available!

Chevron is all the rage right now.   It has become so popular that you are seeing it in multiple industries and markets.  It is in fashion, interior designs, architecture, web designs, advertising, packaging, and more.   We have recently introduced our 20” Burlaps in this past year and it has been a huge hit!  Such a big hit that we decided to bring in more bold and beautiful designs.  So here it is!! What so many of you have been waiting for this year!  Get your phones ready and call us while available!


        We use the burlap for a large variety of projects and designs.  Here are some pictures of how we use it! 
 Here we have used our 20" by 16" Wooden Elephant Cut out and the 20" by 10 Yds Houndstooth Burlap.
We also have wooden cut out in 20" Letters and 12" Letters.  This is a real simple little project.  Just use spray adhesive to attach the burlap and then cut off the extra. Note: Use a cardboard or something you don't mind ruining to do this on because the adhesive is very sticky.


Here we used a burlap coffee sack to cover a chair (Directions of earlier posts).  Then just cut a strip of burlap to monogram and attached with bows.  We have the Burlap Coffee Sacks available for only $2.00.

In this picture you can see we have used the Burlap for multiple things.  We have made curtains, a runner, and stocking with it.  You can get so creative burlap.  So many endless things to do with it!