
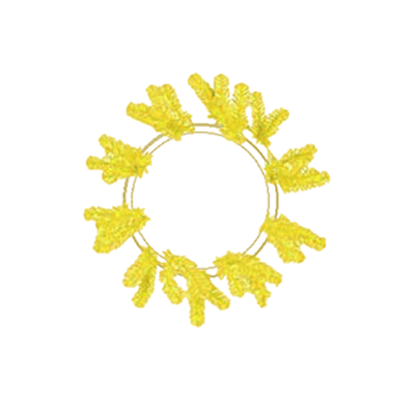
Designing new and unique items is something we love to do here at TMI Gifts. We have two incredibly great Designers with us now. What we want to show you today is how to make a tag wreath. Brittany does a great job of showing how great your scrap ribbons can be. In this particular video Brittany uses new rolls of ribbon but she has created a tag wreath made out of left over ribbons that she had laying around. That is how she came up with this wreath look.
First you need a 1- 24" Yellow Work Wreath (Of course you can always change up the wreath color because it isn't that noticeable after all the ribbon is put on it)
4 rolls of 4" x 10 Yard Jute Ribbon
Yellow Jute
Lavender Jute
Sea-foam Jute
Hot Pink Jute

Cut these into 8" to 12" strips. It does not have to be precise.
The next step is pretty simple. All you do is take the strips you have cut
and place them in between two branches and twist the branches together
to secure the ribbon. Attach a second piece of ribbon on top of the one
you just did. After attaching each piece it should look a lot like this.
 (This is not the exact wreath in the video being made)
In this video Brittany has mixed the colors together to create a more spring look but you can also do all solids. Just be sure to give each branch two strips of ribbon so that it creates a full look. and place them in between two branches and twist the branches together
to secure the ribbon. Attach a second piece of ribbon on top of the one
you just did. After attaching each piece it should look a lot like this.
1 roll of 4" x 10 Yard Wire Ribbon. Pink is shown used in the video.
Leave ever how much ribbon you want hanging down from your bow. Brittany leaves about 12". The start looping from side to side. Here there is 3 loops on each side. You can make a larger bow by larger and more loops. Hold that and start with your printed ribbon.

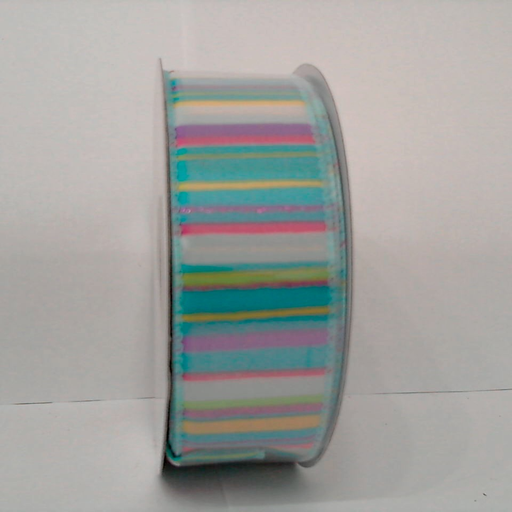
1 roll of 1.5" Printed Ribbon is used to make a bow. This is not the exact one shown in the video but close to the colors. Note: Click on any of the pictures to take you to the product shown.
Loop this ribbon just like you did with the wire ribbon but do it on top of your wire ribbon. In the video Brittany also did three loops on each side. Now, most people just zip tie the bow together. As Brittany is holding the bow she loops some ribbon snug around her thumb before cutting the ribbon. She then zip ties her bow and places the tie where her thumb was so that the zip tie isn't visible. You don't have to do this step but it is an option. If you don't want to do that just skip that step and zip tie where you were holding your bow.
The last step is securing the bow to the wreath. You can either zip tie the bow to the wreath or you and use the wreath branched to secure it in.
So that is how you make a tag wreath! Watch this video to get a better understanding of how Brittany used each item.
So that is how you make a tag wreath! Watch this video to get a better understanding of how Brittany used each item.
No comments:
Post a Comment